Deploying Your First Bundle
Welcome to part 1 of Massdriver's Getting Started series! This guide will walk you through your first experience with the platform by publishing, configuring, and deploying a simple bundle. By the end of this guide, you'll understand the core workflow of working with Massdriver bundles.
What You'll Learn
By the end of this guide, you'll understand:
✅ Bundle publishing - How to package and upload infrastructure code to Massdriver
✅ Bundle structure - Understanding the key files that make up a Massdriver bundle
✅ Parameter configuration - How JSON Schema creates user-friendly forms with validation
✅ Bundle presets - Using pre-configured parameter sets for common scenarios
✅ Visual deployment - Deploying infrastructure through the drag-and-drop interface
✅ Safety features - Built-in validation, immutable fields, and error prevention
✅ Real-time monitoring - Watching deployments progress through the platform
Prerequisites
Before you begin, make sure you have completed the prerequisites to install the Massdriver CLI and authenticate with the platform.
Step 1: Download the Getting Started Repository
In order to follow along with these guides, be sure to download Massdriver's getting-started repository which has all the materials you'll need.
Clone the getting-started repository:
git clone https://github.com/massdriver-cloud/getting-started.git
cd getting-started
This repository contains materials for all of the guides in this "Getting Started" series. For this guide, we'll be working in the
01-deployingdirectory.cd 01-deployingTake a moment to explore the bundle structure:
ls -laYou should see:
massdriver.yaml- Bundle definition and parameterssrc/- Directory containing infrastructure codeoperator.md- Documentation explaining the bundle, presented in the Massdriver UI
If you inspect the src/main.tf file, you'll see that this bundle is a terraform module which creates a few random resources. Nothing in these Getting Started guides will required connectivity to any of your cloud accounts.
Step 2: Publish the Bundle
Now you'll publish this bundle to your Massdriver organization, making it available for deployment.
From the bundle directory, publish the bundle:
mass bundle publishThe CLI will package the bundle and upload it to Massdriver. You should see output similar to:
Publishing getting-started to organization yourorg...
Packaging bundle getting-started...
Package getting-started created with digest: sha256:39ce534f78fadb5fba4c7734c5dd2fb429e3000e53b1eabc909656ac65e7e258
Pushing getting-started to package manager
Bundle getting-started successfully published to organization yourorg!
Step 3: Deploy the Bundle
Now that you've published your bundle, its available to deploy into Massdriver organization.
Access the Platform
- Log into Massdriver Cloud
- Navigate to (or create) a project where you want to deploy the bundle
- Select or create an environment (such as "development" or "staging")
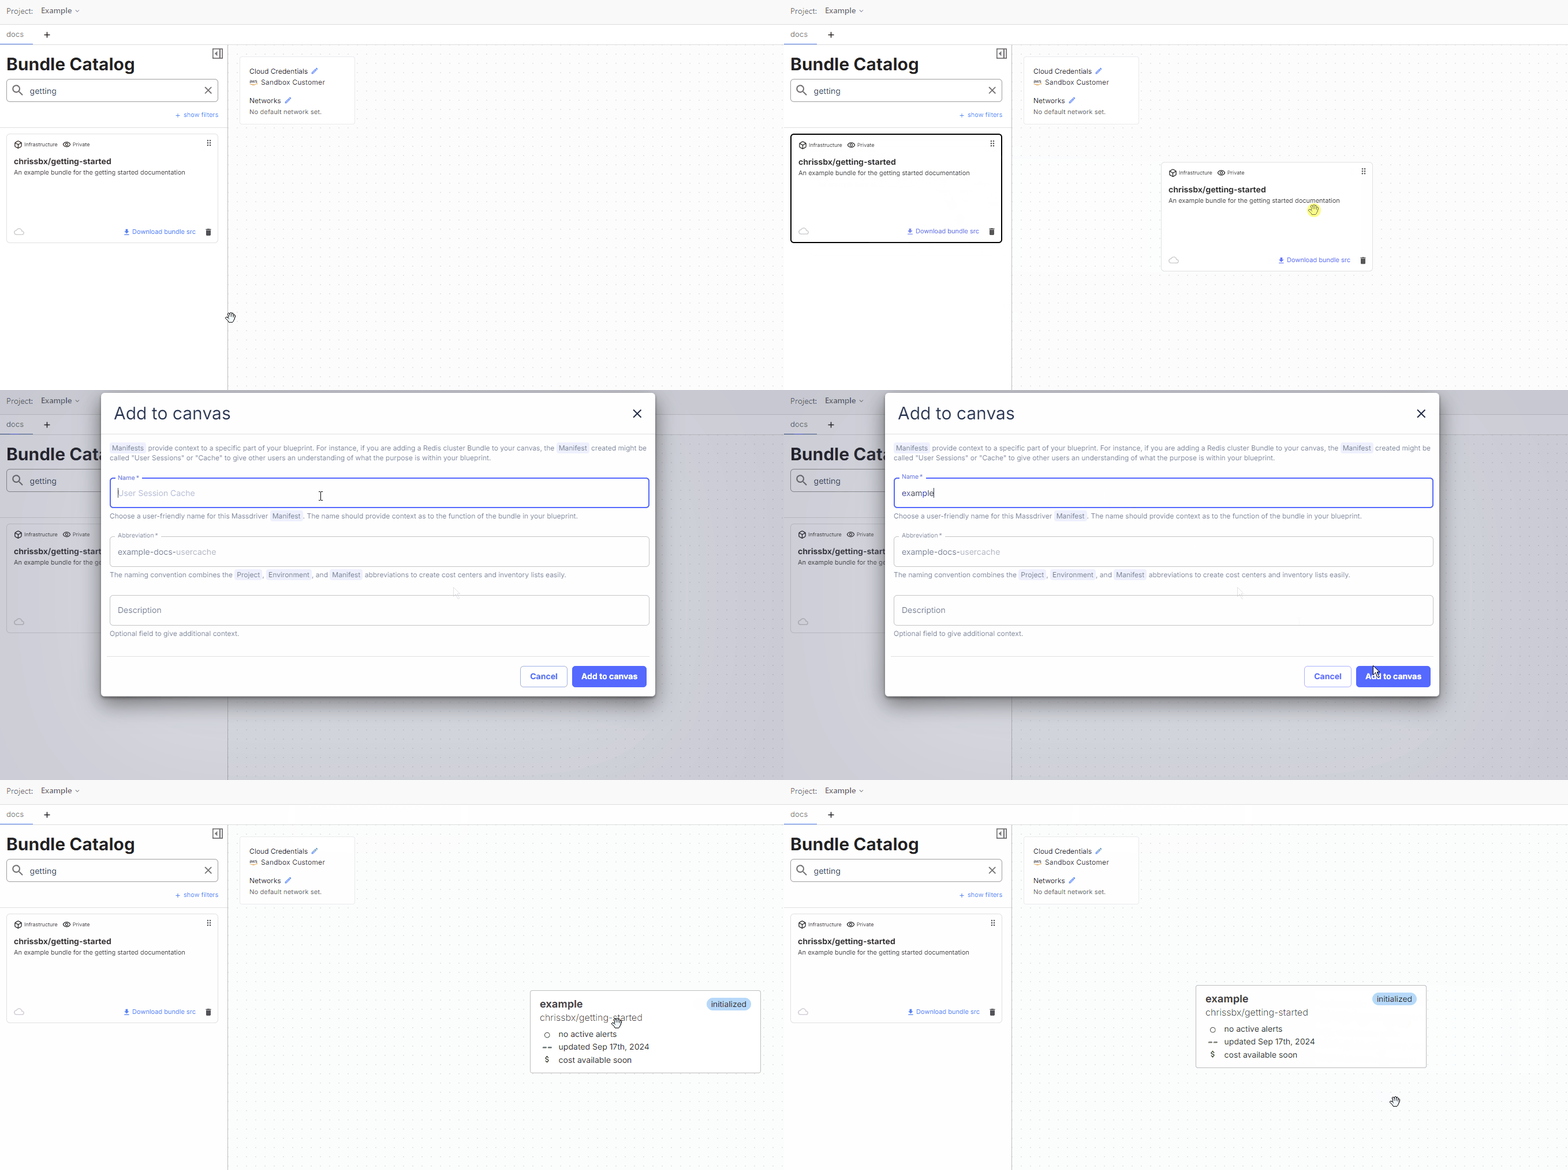
Add the Bundle to Your Canvas
- Look for your getting-started bundle in the sidebar under "Your Bundles"
- Drag the bundle from the sidebar onto the canvas

- Give your bundle instance a meaningful name (like "My First Bundle")
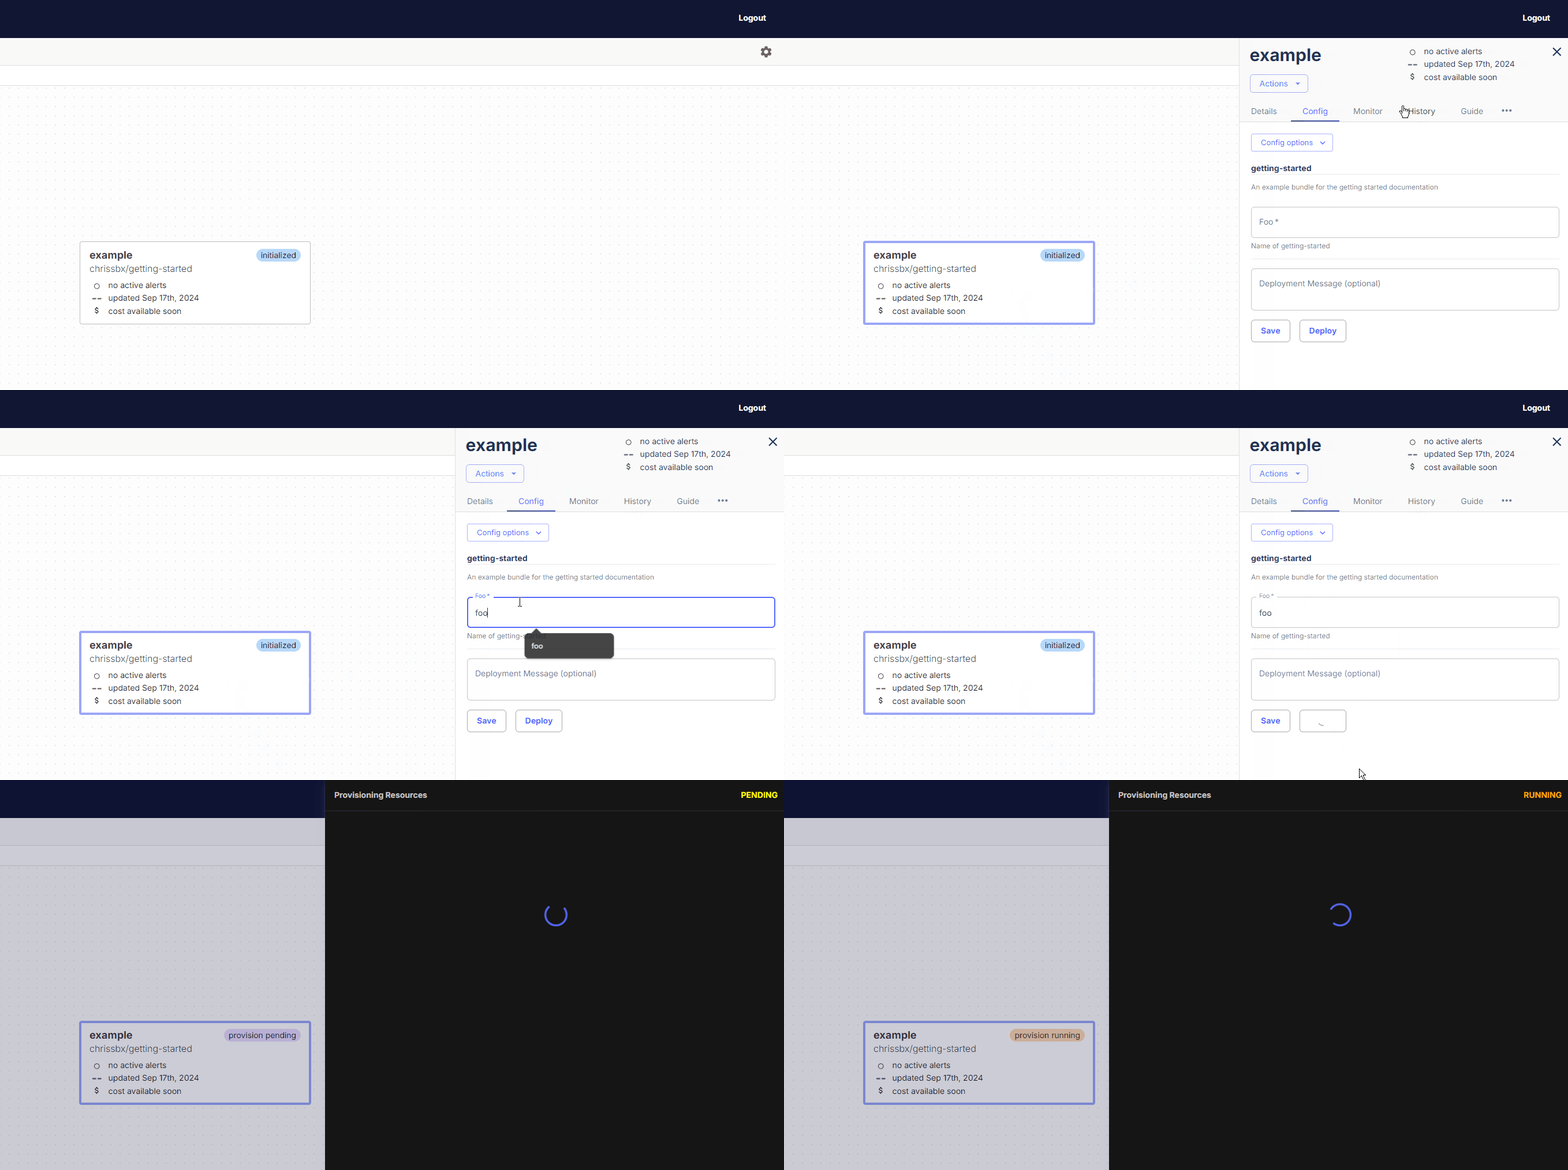
Configure the Bundle
This is where you'll see Massdriver's parameter system in action!
- Click on your bundle instance on the canvas
- Navigate to the Config tab
- You'll see a form with several configuration options:
Bundle Presets
Notice the preset dropdown at the top - this demonstrates how bundles can include pre-configured parameter sets. These come from the top-level example field in the params section of the massdriver.yaml file. In this case there are two presets:
- Production
- Staging
Try selecting different presets and watch how the form fields automatically populate. This allows you to create and customize multiple presets to guide users toward common or recommended configurations, such as dev, staging and production, or single instance and highly available.
Parameter Types
The form demonstrates how the JSON schema definition in the params section of the massdriver.yaml is presented as a form in the Massdriver UI:
- Pet Configuration: Shows an enum field of integers (dropdown with specific values)
- Password Configuration: Demonstrates integer fields with validation (minimum/maximum values)
- Shuffle Configuration: Shows array fields where you can add/remove items
Refer to the JSON Schema documentation for more information the different types, and validations available.
Key Features to Notice
Immutable Fields: Fields can be marked immutable in the massdriver.yaml file. This prevents changes to the field after deployment, preventing accidental, destructive changes.
Validation: Try entering invalid values (like a password length of 5) - you'll see real-time validation that prevents misconfiguration.
Field Descriptions: If params have the description field populated, it will be displayed in the UI to provide useful information about the field.
Deploy Your Bundle
- After configuring your parameters, click the Deploy button
- Massdriver will open a side terminal showing the deployment logs

- Watch the deployment progress in real-time through the platform
Key Takeaways
🔄 Bundles are reusable - Write once, deploy many times with different configurations
🎛️ Parameters drive UI - JSON Schema automatically creates user-friendly forms
🛡️ Safety first - Built-in validation and immutable fields prevent accidents
🎨 Visual deployment - Complex infrastructure becomes as easy as drag-and-drop
What's Next?
Now that you understand the basics, you can:
- Experiment: Try changing parameters and redeploying to see how the infrastructure updates
- Learn More: Explore the bundle's
README.mdfor detailed explanations of each concept - Create Custom Bundles: Use this as a template to create your own infrastructure bundles
- Connect Bundles: Learn about artifacts and connections to build more complex architectures
In the next guide, we'll look at connecting this bundle to another bundle to pass information. Get started now!